Saturday, February 20, 2016

Caramel Apple Wreath

As a kid, my mom was really into Pampered Chef. You know, the company which produces amazing kitchen gadgets, which despite their stupidly exuberant price, you just can't live with out. I have many memories of some of the amazing concoctions she would make, everything from homemade pizza on their pizza ring, to pies which just tasted better because of the $100 pie pan (I'm exaggerating, it probably wasn't a $100 pie pan). But I digress.

A few years back, I found a pizza stone from Food Network at Kohls. It sat nicely with my other pans until recently, when I remembered my mom making this Caramel Apple Ring.

Yes, this golden crescent crusted beauty is the apple ring from my childhood. It not only tastes amazing, it looks nice too. Individuals of all ages (who like apples, cream cheese, and pastry plus caramel sauce) will enjoy it. Guaranteed! 

The recipe is quite simple, so lets break it down: 
  • 2 tubes of crescent rolls (I got the low carb one)
  • 2 packages cream cheese (I got the fat free one)
  • 1/2 cup powder sugar
  • 1 tsp of vanilla 
  • cinnamon sugar mixture to sprinkle over the apples
  • 2 Granny Smith Apples (I got two medium, but one large and a small one would work), cored and sliced
  • Smucker's Sundae Toppings--Caramel for the drizzle


Begin by mixing your cream cheese, vanilla, and powdered sugar. Combine until smooth. Note, that you can adjust the amount of sugar--but you want some in there to sweeten the cream cheese a little. Set mixture aside. 

Peel, core, and slice your apples. If you're gonna take a while getting the next part done, you might put some lemon juice on them to keep them from browning. 

Next, open your tubes of the crescent rolls, and begin laying them out around your rings. The base of the triangle should be towards the middle of the ring, and the tip of it (skinniest part) can drape over the edge of the pizza ring for now. Once you have the ring made with your crescent rolls, put your cream cheese mixture on. Spread it evenly around the ring. 

Take your sliced apples, and layer them ontop of the cream cheese.


Sprinkle your cinnamon sugar on top of the apples.
Take the tips of your triangles, and fold them over the apples and cream cheese.  


I baked mine in a preheated 350 degree oven for 20-25 minutes, until golden brown. Take your caramel syrup and drizzle it over the top. Enjoy! 


Sunday, March 9, 2014

Chicken Pot Pie

The moment of excitement has finally come! Here is my mom's recipe for Chicken Pot pie.
4 red potatoes, washed and diced. 
1 bag of frozen vegetables 
2 chicken breasts
Chicken bouillon 
1/2 cup Half and Half 
1 stick of butter (I use unsalted, so I can control the salt) 
Flour (for roux) 
Half an Onion, chopped

1 Pie Crust (Find the link to the recipe in this post I cut the recipe in half)


Individual ramekins This recipe made about 6 Food Network ramekins, as shown in the photo. 


I begin with cooking my chicken. I boiled mine, as it is easy, and allowed me to prep my other items without worrying about the chicken burning, etc. Additionally, I used the broth as the base for my filling. I prepared my crust per the instructions. Incase you haven't figured it out, I LOVE this pie crust. It is perfect for savory or sweet dishes. You can find the recipe in my post, titled The Best Pie Crust Ever. 

However, if you prefer to walk a more culinary line, then feel free to saute or grill your chicken however you'd like. 

After my chicken was cooked, I removed it to cool, and put my bag of veggies into that same water, along with my potatoes, and let them cook at a medium heat. Meanwhile, I prepped my crust for my ramekins. 

I was feeling rather lazy, so I simply used a pint glass to get the bottoms of my chicken pot pie. I didn't bother bringing the crust all the way up to the edge, however, if you have the time and energy, go for it! 

I then began to saute my chopped onion in butter. I used quite a bit of butter, and I made a roux. I also added about half a cup of half and half to my veggies, as they bubbled away happily. I also added my chicken bouillon, about a teaspoon, and some rosemary and majorum (a pinch or two of both, this is totally optional). 
With my roux made, I added it slowly into my veggies. My first time around wasn't enough of a roux to get it the thickness I wanted, so I made another batch. This is where your judgement comes in. Someday I'll pay attention to my exact measurements when doing this. 

Finally, I had my oven preheated at 375 degrees. I added the chicken gravy-veggie-enhanced goodness to my ramekins, and topped them all with a top crust. Make  sure to vent your pot pies. 

I baked mine for about 40 minutes, until the crust was golden brown. 

As an alternative, you could make just one large chicken pot pie. I have done this as well. Just make the full pie crust (so you have a top and bottom), and use your regular sized pie pan. This is just as effective, though I personally feel the ramekins give you a sense of individualized pleasure.  


Monday, November 4, 2013

Sausage and Wild Rice Casserole

"Is that chinese food?" you might ask. No, that is my mom's sausage and wild rice casserole.

 Casseroles are not something you see on many menus anymore. I can understand it, but this is one that everyone will enjoy, unless you don't eat pork, or don't like the mixture of different items.

The sausage wild rice casserole recipe came from my mom. I'm not really sure how she came across it, so if you happen to be the owner of the recipe, please accept my sincerest thanks.

I remember when my mom would make this dish, and how much I loved it as a kid. The ingredients are simple, but the flavor combination is fantastic. This is one of the many dishes I had as a kid which starred a specific ingredient over and over: Cream of Mushroom Soup. Personally, I keep on average 2-3 cans on hand.

So, here is a recipe from my home to yours. I hope you enjoy it as much as I do!

Here are the ingredients:

1 package Uncle Ben's Original Wild Rice (I actually get the fast cook version. It tastes the same, and doesn't require 30 minutes to cook!)
1 pound sausage (I like spicier sausages, but then again, I like spice!)
1 can cream of mushroom soup
1/2 cup chopped onion (this ended up being about all of a small onion, then again, I like onion!)
1 cup fresh mushrooms, chopped
1/2 cup chicken broth
1/2 cup shredded cheese
1/4 cup chopped celery (about one long sprig)

Directions:

Preheat oven to 350 degrees. Grease a 2 qt. casserole dish. Cook the rice according to directions, and brown the sausage; drain the sausage. Combine the sausage and rice, along with the remaining ingredients. Bake in preheated oven for one (1) hour.

Sunday, October 20, 2013

Pumpkin Bread: Enjoying the Fall

Being a grad student, and one who has been a grad student for almost four years, is exhausting, draining and overall stressful. Cooking has been one of my ways of managing this stress, and I have covered a lot of wonderful meals along the way. 
But now that the leaves are falling, and the temperature is dropping, I find myself in the mood for sweet things. Today, the weather was dreary, and it was a perfect opportunity to do some baking. On the menu: Pumpkin Bread. 

Because I live alone, I decided it was more economical to make mini loaves instead of the traditional loaf. I followed the recipe I got from Allrecipes.com (my favorite recipe resource) and made just one alteration to it. 

The recipe called for chocolate chips, and I do like chocolate chips, but not everyone (such as my mom) does enjoy them. And because I also had the additional agenda of stashing some easy housewarming gifts for all of the amazing halloween parties I will be attending, I decided to make 3 of the 6 loaves without the chocolate chips. 

You can find the recipe for this tasty bread here.


Saturday, September 7, 2013

Return to the Kitchen: Greek Burgers


I've been away most of the summer, and I can't believe it's already September! I've had a couple culinary experiences of the summer, but wanted to share one of my more recent achievements. That would be my Greek burgers.

A few years back my sister gave me a spice packet which was of mediterranean spices. I used all of that packet, so I returned to my trusty google to find a recipe, and I did. Food.com had it, and you can find that recipe here.

So, now for my Greek burgers. The key to making these burgers is the spices, but in order to keep your burgers together, you need to have a binding agent, so they don't get too dried out. An egg does the trick.


What you'll need:

For the beef:
1 egg
1 lbs of lean beef
2 tablespoons of mediterranien spice (see recipe above)
Salt and Pepper to taste

For the burger:

Pita pockets
feta cheese (crumbled works fine)
Tzskiki


First, combine your meat and the egg and spices. I use my hands to do this, as it is pointless to dirty up another dish (and don't forget to wash your hands!). Next, take about a hand full of the meat and press it into your desired patty size. I made mine smaller so they would fit in the pita pockets. Turn on the heat to your grill, grill pan, etc. I got mine to about medium high and put some olive oil on it to keep it from scorching. Grill the patties until desired doneness (I stopped mine at about medium).
To assemble the burger, open your pita pocket (but not all the way! Cut about half way around, this will give you a nice pocket for your toppings), and put the tzatziki sauce in, then the feta. You want it distributed evenly. Then put your burger in. I let my burgers sit for a few minutes on a paper towel (the towel got the excess grease, but the burgers stayed nice and juicy). You can serve this meal with carrots, celery and peppers, as they go great with the tzatziki. I also have a side of hummus, which is a great alternative to the tzatziki. 

Friday, March 29, 2013

Chocolate Raspberry Cake

In my past posts you will find Mad Hungry's "Busy Day Chocolate Cake." Today, I spruced it up using Giada De Laurentiis's recipe, a Chocolate-Raspberry layered cake. Giada suggests using a boxed cake mix--I thought, well, I don't like boxed cakes. So, I combined Mad Hungry’s Busy Day Chocolate Cake, and followed Giada’s recipe, and it turned out fantastic!


I garnished the cake with chocolate curls and raspberries! 
This is going to be the BEST Anniversary dessert ever! 


Monday, March 18, 2013

Tuna Avocado Salad


Tonight I made a Tuna Avocado salad, with fresh squeezed lemon, a tablespoon of mayonnaise and a tablespoon of cream cheese. This meal was so tasty. The lemon really enhanced the tuna fish, and the marriage between the mayonnaise and the cream cheese. It was quick to make, and very satisfying--and would be a great small hour meal.

Ingredients:

1 lemon, zested and juiced
1 can of tuna
1 avocado
1 tbs mayonnaise
1tbs cream cheese
1 dash of cucumber seed
salt and pepper to taste.


First, cut your avocado in half, and remove the pit. Using a paring knife, remove the bottom half of the avocado's meat, and add to a bowl. Depending on your texture preference, slice or mash the meat in the small bowl. Add lemon juice, and mix.  Add the tuna, mayo, cream cheese and cucumber seed. For an optional bit of texture, add a tbs or so of sunflower seeds. Mix together, and put back into the avocado halves. Add some lemon zest, salt and pepper to taste, and of course, enjoy!

Saturday, March 16, 2013

My First Recipe--Green Chili Chicken and Potato soup


As a kid, my mom and I would go to a restaurant in my home town called The Camp Robber. They serve the most amazing Green  Chili Chicken and Potato Soup. Even today, when visiting my mom, we make it a priority to stop at the Camp Robber for a bowl of their soup. 

Today I attempted my own rendition of the soup, using some help from my mom who did the leg work. On a closeness scale (to the original) of 1-10, I give it a 9. This is a great meal, and you can adjust the spices to your liking. 

On the note of spices, I learned a "what not to do." The spice mixture I used, which I picked up from Sprouts, contained red pepper flakes. So, I prepped my chicken just like I would any other day--lube it up with some EVOO, and then I added the spice. I washed my hands (any good cook knows you HAVE to wash after handling raw chicken), and put my chicken pieces on my grill plate. That was my mistake. The red pepper flakes emitted a very fragrant odor--which caused a lot of sneezing, coughing and general chaos. Thus a word of caution, when cooking with chilies, it is a good idea to cook on an outside grill, to avoid noxious gases which may result from the heat. 

So, now for my first ever recipe--copy righted to myself, and my mom. Please try and enjoy! Comment below if you have any questions. 
You should let it simmer after you've added the roux, probably about 20 minutes, but the longer the better. However, do not leave it unattended. You should stir it every now and then to ensure nothing sticks to the bottom. 


3 red potatoes 
Olive oil
Foil
4 small chicken breast 
Taco spices (for a kick, add about a tablespoon of red pepper flakes) 
1-2 cups flour 
1 stick butter
 32oz chicken stock
2 cups water
2 cans green Chilies 
1tsp white pepper
Salt to taste


Heat oven to 425 degrees. Drizzle olive oil on each potato, and wrap in foil.  Bake at 425 for 30 minutes or more. 
Serve in a bowl, add a dollop of sour cream, and a tortilla. You might also
serve with a few blue corn tortilla chips for some added texture. 

Prep chicken, by drizzling with olive oil and adding spices.  Grill chicken outside until done, about 5-10 mins per side. Set aside to cool. 

Meanwhile, bring 32 oz stock and 2 cups water to boil. In separate pan make a roux with flour and butter, the consistency should be thick, almost like oatmeal.  Add roux to stock and stir.  Dice up the chicken and chop up the potatoes.  Add to stock.  Add green Chillies from can, and simmer on a low heat. 

Serve with a dollop of sour cream, and a tortilla.  Enjoy! 

Thursday, March 14, 2013

The Easiest Bread Recipe


This no-knead bread is so simple. It takes quite a while to make (up to 24 hours), but you set it and forget it. You can find the recipe here. 

My first loaf, done in the dutch oven. 
When I work with a new recipe, I like to follow the directions (as mentioned in previous posts), this recipe was no different. I did my first loaf in a cast-iron dutch oven just like the recipe suggests. It produced a round loaf (obviously)--and truthfully was a little nerve wracking, just because of the extreme heat the cast-iron maintains. But, the result was amazing. The bread was extremely light. 

Last night, in the small hours of the night, I made two more loaves, with some changes. First, I added a cup of rye flour in substitution for a cup of flour (as suggested by Josh's mom). In the second loaf, I added some caraway seeds, and other spices. 

Caraway and various spices (left) and Rye Bread on right. 
This bread has unlimited possibilities, and is so inexpensive to make (after the initial purchase of various items.  I purchased Wheat Germ, Rye Flour, Wheat Bran and so forth as additives to the original recipe). But when you consider the original ingredients: 3 cups flour, a little salt, 1/4 tsp yeast, and water--you can't go wrong. Plus--bread freezes and defrosts really, really well. So, you can spend a little time mixing, go to bed, wake up and finish it off after work the next day. 

However, this is not a quick dinner fix. As mentioned, your bread will need at minimum 12 hours for the initial rising, plus an additional 2 hours and fifteen minutes for a second rising. The baking time will very. Upon suggestion from Josh's mom, I baked my loaves at 450 degrees for the first 30 minuts (with the lid, or foil covering it) and then turned it down to 425 degrees for the remaining time. 

Saturday, March 9, 2013

Rabbit Loin Cigars with Demi-Glace, and Personal Potatoes Gratin

Tonight we take a trip to France, from our kitchen of course. The secret to French cooking as Julia Child will inform you, is butter. Yep, butter--oh and wine never hurts either. I started my cooking adventure at approximately 5:00 this evening. I knew the Potatoes would take the longest, so that is where I started.

The mandelin came through for me, making the potato slicing quick and simple. I layered the individual ramkins--which I picked up from Kohls earlier in the afternoon-- with potatoes and a few scallion slices. Next, the simple process of melting butter, making a roux (in this case, butter and flour) and adding the milk and cheese.


Into a hot oven, preheated at 400*, and that is done. Next I started my demi glace, which is essentially beef stock, some carrots and garlic simmered down to almost nothing. Then you add a half cup of wine, and let that simmer.


Finally, we came to the main course. It is now 6:50, and I have everything time just about right. Except, I made a simple mistake: I didn't check to see if my rabbit was deboned, which it wasn't.

This took some knife skills which I didn't know I had, but eventually I had several pieces of rabbit ready for my puff pastry. I added my mushroom mixture, as well as a few stalks of frozen asparagus which I had let defrost over the steam of my demie glace. I wrapped it all up, and put it into my now reduced heat oven of 350*. The cooking time, for me, was not at all what the recipe I was following suggested. It was in for over an hour, unlike the "10-15 minutes" suggested.


So, now for the taste review: The meal was good. Perhaps if I had paid attention and purchased a deboned rabbit, the meal would have been even better. The timing caused the potatoes to get a little darker around the edges than I had hoped. But the demi-glace was extremely nice, a subtle wine flavor with the beefy undertone. I have this meal a 4 1/2 stars. Not the best I've made, but definitely worth it.

Tuesday, February 26, 2013

Chocolate Hazelnut Potstickers

We had a lot of food for our Oscars celebration, and this was the star. I saw it on Hallmark's Mad Hungry: with Lucinda Scalla-Quinn, and you can see her recipe here. She calls them ravioli, because technically, that's what they are.  But the secret is using Wanton wrappers. I found my wrappers at my local King Soopers in the produce aisle of all places (I figured I would find them in the frozen desert area).


The wonton wrappers make this an extremely easy dish to make.  Just lay your wrapper out, put a tablespoon of your hazelnut spread on it. Then, using a pastry brush, brush water around the edges, and add another wonton wrapper on top of it (the water acts as a glue). Cut your wontons with a cookie cutter, or a a drinking glass.

Next, heat 1/4 cup of water and 2 tablespoons of unsalted butter on the stove. Add your wontons to the pan, and cover tightly. This will steam the wontons.  

Allow to steam, covered for two minutes. 

Remove the lid, and let the rest of the liquid evaporate. 


You'll know when they are done, the smell is fragrant and reminiscent of chocolate chip cookies being freshly baked. 


Remove from the pan. Two scoops of vanilla ice cream and orange zest finish this delicious dish! 

Sunday, February 24, 2013

Oscar Worthy Crab Dip

It's the night of the Oscars, and if you don't live in Greeley, you're probably getting together with friends to watch the big event. Hopefully, it's not the late hour, and you have plenty of time to make some yummy appetizers. But, if it is the late hour, then here is a great recipe for you!

Final Product


It's my mom's Crab Dip. Here's what you need:
12 oz. Cream Cheese (I used the 1/3 Fat option), room temperature
1 can crab meet (best to go with quality here--you don't want tinny tasting crab)
1 bottle of Red Chili Sauce (Heinz or similar)
Half a lemon's amount of juice
2 table spoons worcestershire
Grated onion (I used freeze-dried chives), about two tablespoons
Parsley

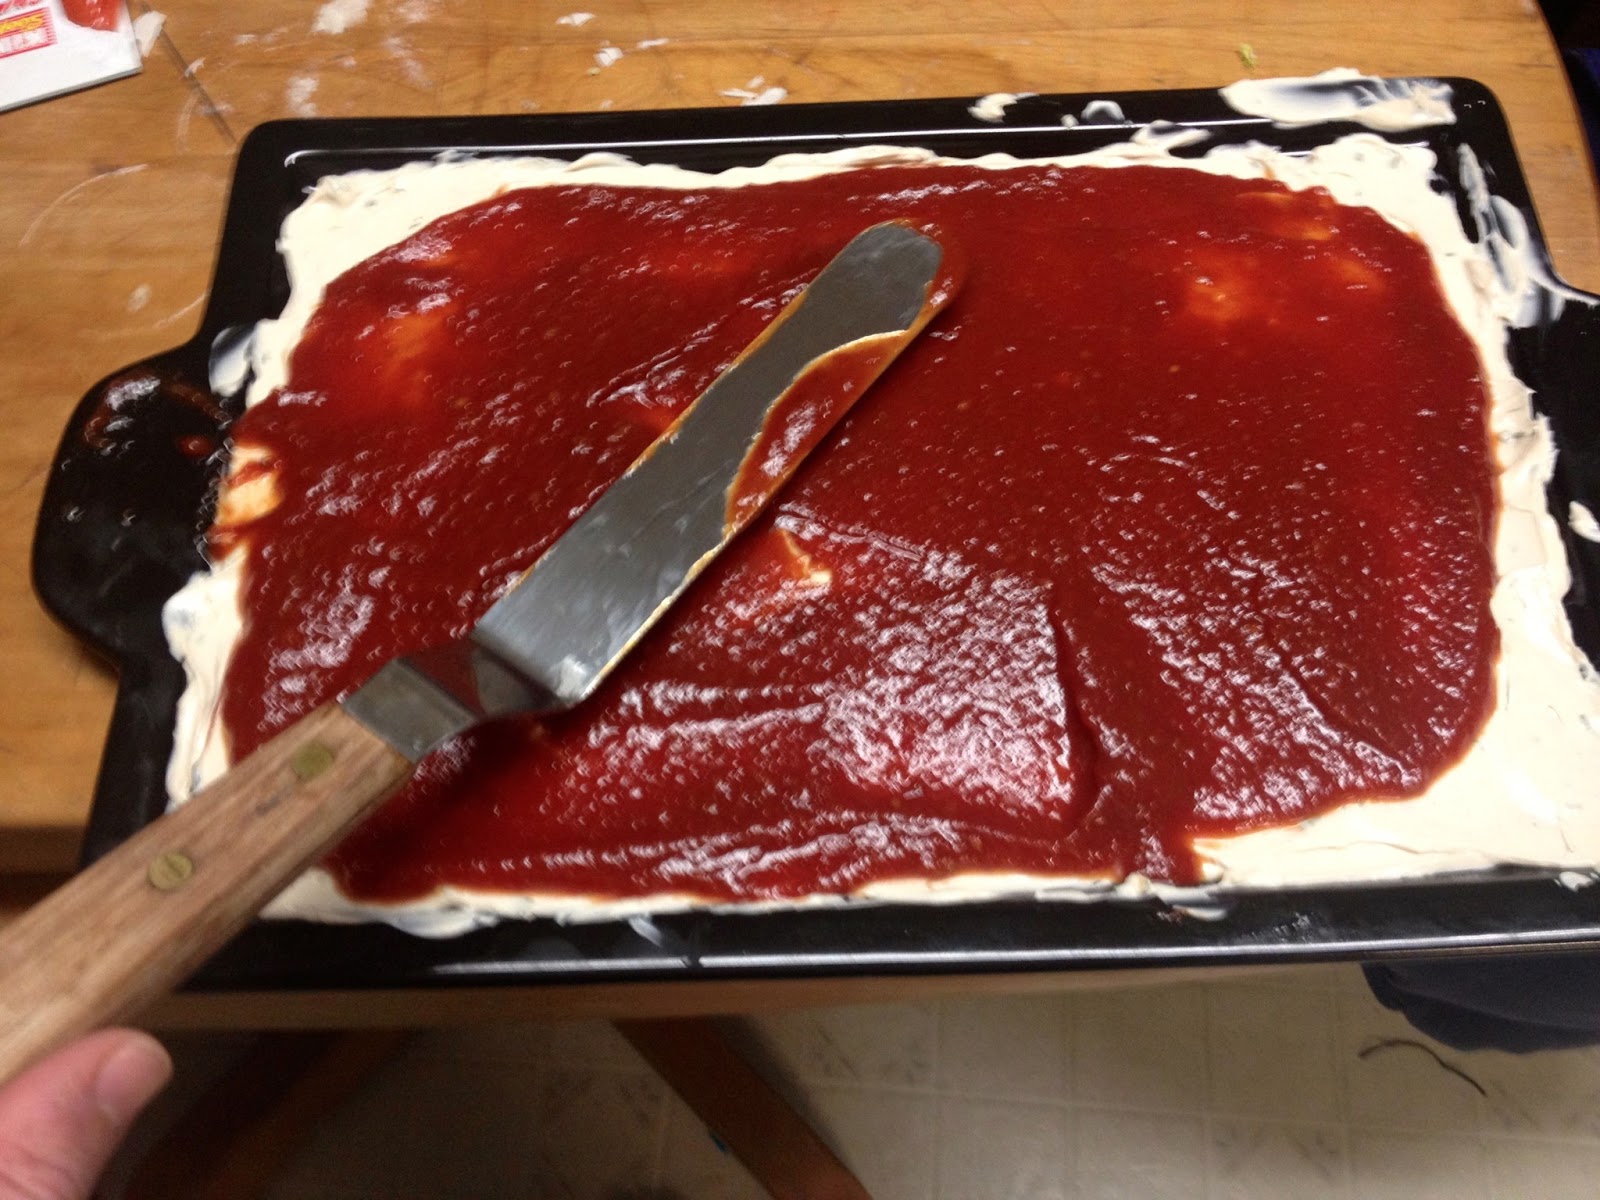
Offset spatulas are great for spreading. I received mine as a gift from an elderly friend, but I'm sure you can find one in a   specialty cooking store. 
Mix the cream cheese, lemon juice, worcestershire and onion together in a small bowl. Using an offset spatula  spread this on your service platter.  Layer the bottle of red chili sauce on top of your cream cheese mixture. Next, sprinkle your crab meat over the chili sauce, and finally sprinkle your parsley. Refrigerate. Serve with Wheat Thins (I prefer plain).

Enjoy!!!

Quiche and Chatter

Eggs, the wonder.

There was a commercial a few years back which stated the Amazing Egg. Well, it's true. They are the corner stone of good cooking, unless you're french, then it's butter. But it's amazing to think that I used to HATE eggs, until a few years back.

Mini Quiche 
I made mini quiche this late hour. The recipe I used was simple: pie crust, eggs, cheese, and a filling (I used chopped bell peppers). The mixture is not important, but as a suggestion, make sure your eggs equal at least a 1/2 of your other ingredients). You can use anything for a quiche. I recommend checking in on your quiche a lot, thus the timing will depend. I will post a detailed instruction later.


Ingredients for these:

1/4 cup milk
6 eggs
1 cup cheese
1 Red Pepper, diced
1 Yellow Pepper, diced
Salt and Pepper to taste

1 Pie dough crust
Cooking Spray


Mix the eggs, milk, cheese, peppers and S&P. Set aside. For mini quiche, use a round cookie cutter, or if you don't have one a standard drinking class will work (I used two glasses of different sizes, as I used two different sized muffin pans). Put cut pie crusts into muffin pan. Spoon in egg mixture, just enough to cover the crust and a little bit of the side. Bake at 350 degrees, approximately 30 minutes (as always, it's better to start at about 15 minutes, and check in. Better to add time, as you can't take it away!).

Monday, February 18, 2013

The Best Pie Dough Recipe--EVER


Cherry and Peach Pie 


So, I realized after my last post that I have not actually discussed my favorite pie dough recipe on here. So, here we go. While watching the show Mad Hungry on the Hallmark Channel, I fell in love with several of Lucinda Scala-Quinn's recipes--and have discussed quite a few of them on this blog. However, the absolute staple recipe which I have come to love is her pie dough recipe, aka Basic Dough.

The recipe is extremely simple, and consists of four ingredients. I recommend using a pastry cutter, as I feel it gives the best results. Second, I would suggest paying close attention to the elasticity of the dough. Being the person I am, I am extremely hesitant about deviating from the recipe. If it says use "1/2 milk" then that's all I use. However, this is one place where it is okay to deviate. If the dough is too dry, add more milk.

Don't over work your dough (i.e. roll it out too much). A lot of the flakiness of the dough comes from the rather good chunks of butter, which melts into the rest of the dough, and creates air pockets (aka the flakiness). Thus, you want to see the chunks of butter when you are rolling out your dough.

Finally, this doesn't have to be a sweet pie only dough. I've used it for quiche, chicken pot pie, etc. The website also notes that you can freeze the dough (so you can make a lot of it in advance, just divide it before you freeze).


Chicken Pot Pie, full crust


Stuffed Cajun Chicken and Potatoes Gratin


To sum it up, before you read, "Yum."

I've been a bit absent from the cooking world lately, mainly due to lack of inspiration. However, I now have the Food Network again, and my mom got an iPad and now has Pinterest. Thus, how I found protein for this meal: Cajun Chicken Stuffed with Pepper Jack Cheese and Spinach. The recipe, was rather easy, and I did do as the author suggests, and I made my own Cajun seasoning. I did have to make a few substitutes (no onion salt, so used celery salt instead).  

However, I would say I will do it a bit differently, next time. The author suggests that you pound your chicken into a 1/4'' flatness. I did this on the first one, but it was nearly impossible to stuff, and the "rolling" was quite difficult. On the second breast, I merely "butterfly" cut the breast, so that I had a nice pocket, leaving two "seams" on the side, as well as of course the bottom. This made the stuffing of the spinach/pepper jack much easier. 

The next thing I altered, was I bought my spinach fresh, and cooked it. In case you were not aware, spinach cooks extremely quickly, and also significantly decreases in mass. The "bunch"of spinach you buy, will shrivel up to almost nothing, but it is all still there! (I just put some olive oil in a frying pan, put it over medium heat, and added the spinach, popped the cover on, and let it cook down, occasionally tossing it just to ensure it didn't burn.) 

Finally, I would just note that if you are cutting the recipe down, you won't need all of the spice. My mistake was not testing the mixture to note the spiciness. Thus, for the future, I will probably decrease the spice by half. 

On to other things. I used my trusty AllRecipes app on my iPhone to find the Potatoes Gratin. My amazing mom bought my partner and I a mandolin, so I of course had to find a recipe which I could use it for. This recipe is very straight forward, and I would rate it 5 stars. The taste is simple, and the onions really enhance the cheese and potato flavor.  


And the finale: 


This is a Tart Cherry and Peach pie. I used my favorite pie crust recipe which I've blogged about before, and the purchased filling from the store. I normally would not buy pre-made fillings, but this filling came in a jar. The crust is latticed as you can tell, and so darn flaky. I prepped the dough (one note I will make is, sometimes the dough is a little dry, so just add more milk. I think I ended up using 3/4 of a cup as opposed to 1/2, as the recipe suggested)  like always, and then preheated the oven to 350*.  I didn't make any changes to the filling, but I did taste it before I dumped it all in. 

This pie will be great with a scoop of vanilla ice cream. 


Saturday, June 30, 2012

2 iPad Cooking Apps You Can't Live Without


Okay, so I am a big fan of my iPad. I would almost feel comfortable getting rid of several of my cook books because of the app. I won't, because I want a back up, but that is how much I love these apps. I'll go over the top 2 apps that I enjoy, and you can decide from there.

iPad Screenshot 1


Believe it or not, I have been using this site (and cook book) for a very long time. But, the iPad app simplifies the whole process. First, it has this AWESOME feature which allows you to gain inspiration, and it is literally called "Inspire Me."  First, you select the course, then the ingredient, method and time. If you've paid for the Pro App, you also get the option of Occasion and Cuisine. Here's where the inspiration comes in. The app starts filtering pictures down, almost tetris like. Ones that you are interested in, you can tap the picture, and it brings up a summary screen. From here, you can decide whether or not you want to read the recipe, find more like it, or review it later. 

The Allrecipes app also has a few nice if you purchase the pro version. First, a recipe box (bye bye hand written note cards). Also, a shopping list. I LOVE the shopping list, because I can quickly go through it, and check off things I already have, so that I don't buy it over and over, and have a concise, easy to access list of what I need from the store. If you're a last minute, short hour cook like me, who likes inspiration on the go, this is perfect. 

The final part of the app, which is cool, is the way the app walks you through the steps. After you've decided what you want to cook, you tap the "Start Cooking" button. This brings the app into horizontal view, so you need to be sure you have a stand. It has a built in timer, for easy access, and you can quicklky tap through the different steps, which in a long recipe is really useful. 

One downside I found for this app, is that it sometimes times out. and when that happens, the timer (for me at least) has quit working. Now, I just did a test, to see what would happen, and I tapped out of the app using the [] button at the bottom of the screen. Then I reopened the app. The timer did go down. And I also used the top button to shut the screen off, and it still worked. So, maybe it was a one time fluke. 

Overall, I give this app a big thumbs up as a necessary, late hour cook's app. 

Next up: Epicurious


iPad Screenshot 1

This app is nice. I don't have nearly as much to say about it as I do Allrecipes. One criticism I have, which I'm sure is up for debate, is the user interface (UI). The UI of epicurious seems to be slightly less friendly than AllRecipes. However, when I can't find something on AllRecipes, this is my back  up app. It has similar functions, such as the shopping list etc, which unlike AllRecipes, is free, but in order to sync your recipe box (from your computer perhaps?) you have to pay $1.99 for it.
This short hour cook's preference is allrecipes, but this is an excellent contender, and one that I still use. 


Ok, at this point, I bet you're slightly disappointed in my over zealous review of Allrecipes, and the lack luster review of epicurious. I guess, I'm biased. But these are two iPad apps that if you haven't checked out, you definitely should. 

Thursday, June 28, 2012

Food (and persons) in Kitchen Unity

Undoubtedly, if you follow me on FB, then you have probably seen the majority of these pictures. However, I did want to share one final recipe, which I found from one of my favorite sites, allrecipes.com.

Josh is responsible for a good portion of this dish, but one of my favorite parts about this meal was the unity which was experienced in the kitchen. No, I'm not talking about my relationship (which I could, because that was very obvious also), but rather the unity which was experienced with the food.

The chicken was seasoned (by Josh) and pan seared until cooked. Mean while, I began prepping the sauce--which paled in comparison to the work Josh put in, as well as began prepping the other food. Melting butter, unfortunately, doesn't take a lot of skill. Finally, the chicken was complete. The fragrance was amazing, a combination of dill, garlic, and of course, chicken.

The sauce so simple, it is almost sad to discuss. Or at least, the recipe presented it as such. Josh suggested I deglaze the pan with a splash of wine (a suggestion, for which I would have been resentful of for not thinking of it myself, except I was just reaching the fridge for the wine when he said it). This was a GOOD decision. The deglazing of the pan picked up all of the extra bits of flavor left over from the chicken. Then, it was time to add the cream (whisk, whisk, whisk!), and finally the capers.

At this point, the meal had just come together. The couscous finished within 30 seconds of the plating of the chicken, and the artichokes followed.

You can find the original recipe here.


Wednesday, June 27, 2012

Another Mad Hungry Recipe: Busy-Day Chocolate Cake

As mentioned in previous posts, I am slightly obsessed with Lucinda Scala Quinn, who does the cooking show Mad Hungry on the Hallmark Channel. And, even though I no longer have TV, I have still found her blog, and recipes useful.

Here is one of her recipes which is just amazing, the Busy-Day Chocolate Cake.
This is such a great cake, and so simple. Plus, are you a vegan, or out of eggs? No problem. This cake uses a nifty combination of vinegar and baking soda as opposed to eggs! Just add a fantastic frosting, which a quick google can easily find for you, and you're all set. This cake takes about an hour start to finish, but it is so worth it. 

Lucinda even mixes hers in the same pan she bakes the cake in--though, when you are making round cakes, it is a little more difficult. For this one, I actually split the batter (which I mixed in a bowl) into two cake pans (so I didn't have to try and cut it later), then I did a layer of the home made frosting in between the two cakes. 

The Amazing Milk Shake Sucker Upper Machine

While visiting a dear friend in Rifle, CO, we went to one of the nicest 7/11s I've EVER been to. I kid you not, this was the elite of 7/11s, with a decent pizza parlor (at least it smelled good), a wide array of beverages, and the CLEANEST bathrooms I have ever seen.

Yes, it was awesome. But, this is a cooking blog, so why am I describing this 7/11?

This would be the reason:

I call it, the Amazing Milk Shake Sucker Upper Machine, because, it does just that. You take a cup from the freezer (not pictured, but to the right) which has the ingredients. Then, you take the lid off, (very important) and put it at the bottom of the machine (above the control panel, below the touch screen). You use the giant touch screen to select the thickness of your milkshake, and press the button. The machine sucks up your cup, and within 30 seconds, spits it back out. You then have an amazing, creamy (and extremely delicious) milk shake. So, I hope you all take a trip to the 7/11 in Rifle, CO for the Amazing Milk Shake Sucker Upper Machine, and enjoy it as much as I did. 

Copy Catting: A friend inspired return to the blog

It's been a while since my last post. And to be frank, it's for good reason. I have been cooking still, but on a slightly more regular basis (and not at the small hours of the night). So, to counteract my absence, I am going to post several things at once.

First, a brief discussion about my absence. On April 5th, I met Joshua Larson. And since then, I have been in a very happy relationship with this wonderful man. That really doesn't explain my absence (I know you are wondering, what were you doing before April 5th, 2012, seeing as your last post was May 5th of 2011?)  Well, I'll tell you briefly. During the summer of 2011, I was in class. During the fall, I was also in class, and I also began seeing clients. In the spring of 2012, I was ... never mind, lets just leave it as unhappy until April. :) 

Now, onto the food. 

One of the better things about being in a relationship, is your cooking time seems to be regularized. I won't give you every single meal I cooked for the past year, because frankly, that would be boring. I am, however, going to highlight some great ones... as soon as my pictures are uploaded.

We start with a Lemon Roasted Chicken. 

This is a recipe from my eldest sister, Stephanie. And, to be quite honest, it is simply AMAZING, and wonderfully simple to prepare. Essentially, it is a whole chicken, salt and pepper, 2 lemons and an herb blend which you can pick up in your local grocery store. I'm not going to post the recipe, but if you are interested, let me know. 

The highlight of this meal, is the fresh, tender, and yet a slight crisp on the chicken's skin which is lemony, and succulent. I added a side of couscous, and a fresh salad to the meal, along with a gravy made from the drippings, and a couple tablespoons of white wine. I was able to do this meal for under $20.00 (including the wine), and Josh and I both agree it is a keeper.  Plus, the left overs make great sandwiches, or can be used in other recipes which require chicken. 

Next up: a Ghiradelli Chocolate Mousse 

Ok, this is pretty simple to describe. Can you picture the most tasty dessert in the world? This is it. If you like chocolate. The mousse has a wonderful texture, and the extra couple dollars for the Ghiradelli chocolate morsels is totally worth it. I spent about $15.00 for ingredients, but made it last, by cutting the recipe down from 8 to 4. I made it twice over the next two weeks, once for Josh's birthday, and then again for a special couple's treat the next week. You can find this recipe at AllRecipes.com. (I hope you're going there NOW.)


Finally, Avocado Eggs in a Basket ... 

Josh and I were inspired by The Next Iron Chef and decided to try our own version of one of their meals.  This picture is a little difficult to decipher, but the only thing you need to know is, it was worth it. Since I feel I have changed a good 30% of this recipe from Food Network's version, and since I didn't really use a recipe, I will give you one of my own. 

This is for 2 people:

2 avocados, pitted, and sliced horizontally so that the pit hole is visible (the "basket")
4 eggs
Seasonings to taste (I put lots of garlic on Josh's, and I seasoned my own with some cayenne). 
Cheese of choice (optional) 

Heat the oven to 325. Drizzle an oven safe pan with about a tablespoon of olive oil.  Place avocado slices in a large, oven safe pan. Delicately, crack the eggs into the pan, so that the yoke sits in the avocado pit's hole (the "basket"). Season eggs. If desired, add cheese. Place in oven until eggs are to desired setness (ours were in for about 10-15 minutes). 

Well, that just about brings you up-to-date, and has showcased a small amount of my adventures in cooking. 

Until later, 
The Small Hour Cook